


How to Verify Your Shopify Store with Google Search Console – In this article I will show you how to verify your Shopify store with Google Search Console.
You will learn what Google Search Console is, why it’s important for SEO and how to verify your Shopify store.
If you want to learn more about the basics of SEO for Shopify, make sure you check my other articles:
- Shopify SEO Stats for 2021
- Optimise Shopify Page Title and Description
- How to Add Shopify Alt Tags to Theme Images
- How to add Alt Tags to Shopify Product Images
- How to Add Google Analytics to Shopify
- How to Add SEO Headings in Shopify
- How to Optimise Your Shopify Site Structure
- How to Edit Shopify Robots.txt File
- How to Find and Submit Your Shopify Sitemap
- How to Verify Your Shopify Store with Google
- How to Create a URL Redirect in Shopify
- Duplicate Content and Shopify
- Link Building and Shopify
- How to Compress Images on Shopify
- How to Improve Shopify Page Load Speed
- How to Backup Your Shopify Store
- How to Enable AMP in Shopify
If you don’t know how to verify your Shopify store with Google Search Console, feel free to book our Shopify Support package.
What is Google Search Console?
Google Search Console is a free tool by Google where you can monitor and fix a number of technical aspects about your website, including:
- Number of indexed pages
- Security Issues
- Number of Links
- Number of Impressions and Clicks for Selected Keyword Searches
- Sitemap
- Robots.txt file
Why is Google Search Console Important for SEO?
Google Search Console is often the first port of call for a brand new website. Submitting the sitemap for your newly-launched Shopify store can help Google find, crawl and index your web pages a lot faster.
How to Verify Your Shopify Store with Google Search Console
To verify your Shopify store with Google Search Console:
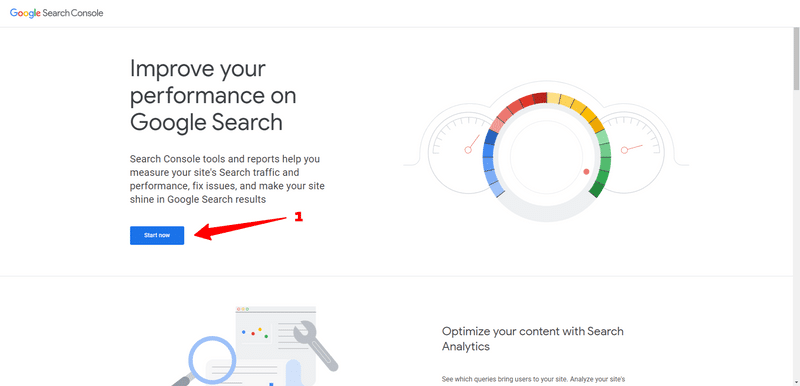
- Log into your Google Search Console account by visiting https://search.google.com/search-console/about and click on Start Now . If you don’t have an account, simply sign up by using your Google account.
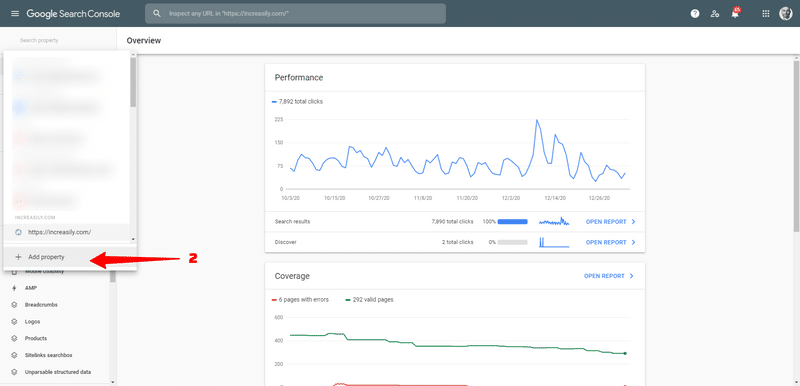
- Click on the top left dropdown menu and select Add a Property
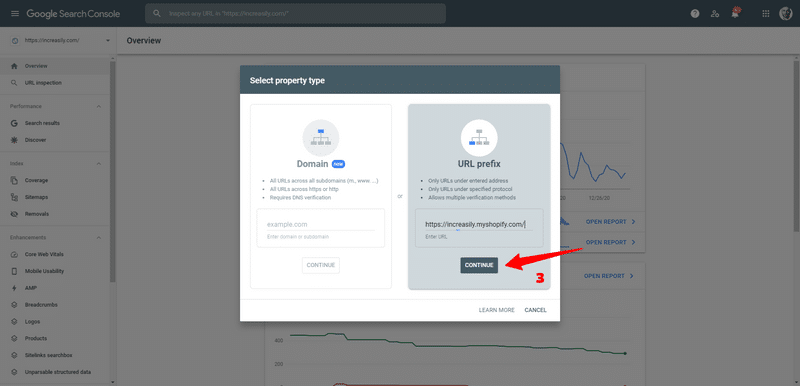
- You will be given two choices based on property type: Domain or URL Prefix. For the purpose of this tutorial, enter your Shopify store URL under URL prefix and click on Continue
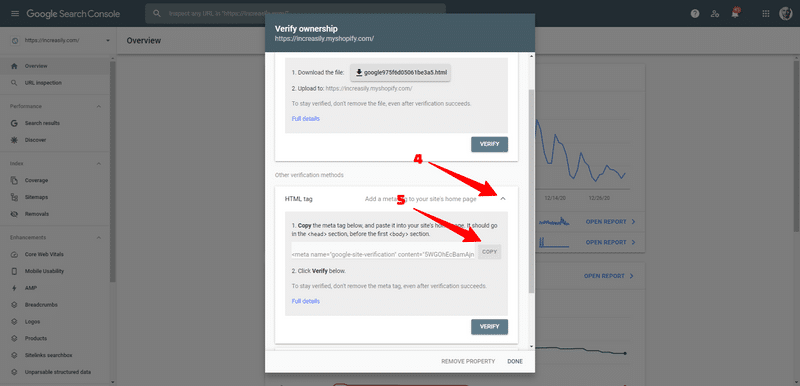
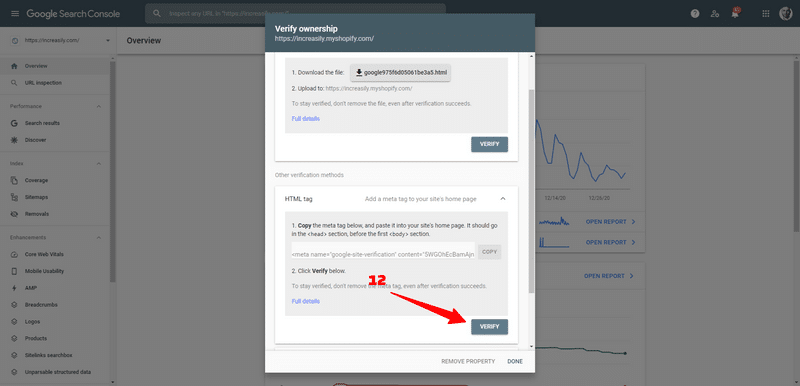
- You will now be given a number of ways to verify your Shopify store with Google Search Console. Click on HTML Tag
- Click on Copy next to the HTML tag to copy the string of code
- Now go back to your Shopify store dashboard and click on Online Store > Themes
- Click on Actions
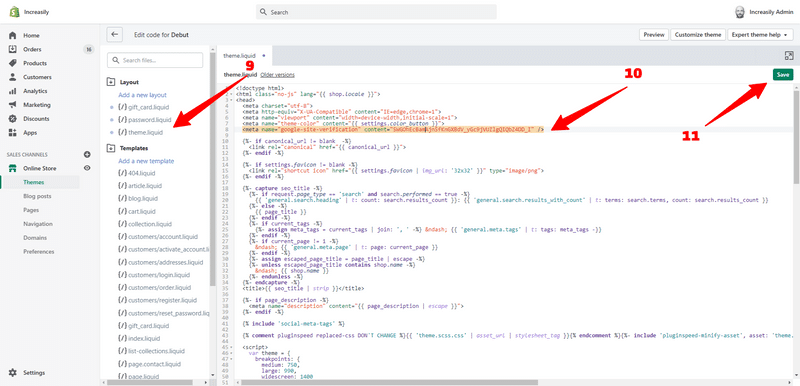
- Select Edit Code from the dropdown menu
- From the left navigation, select the theme.liquid file
- Past the previously-copied HTML tag
- Once done, click on Save
- You can now go back to Google Search Console and click on Verify
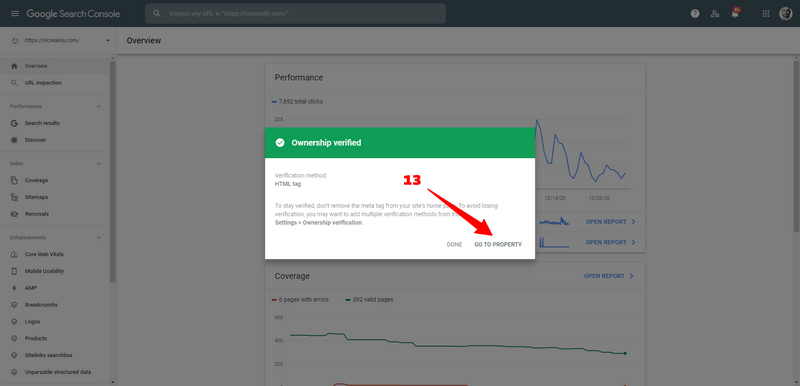
- If you have done everything correctly, you will see a ‘ownership verified’ message. Click on Go to Property to access your newly-created property on Google Search Console
1
2
3
4-5
6-8

9-11
12
13
Sources
Related Posts

Comments (4)
Comments are closed.
Ravi Singh
31 May 2021Very useful, this is the best way to connect Shopify with search console. Also, Search console will help us to understand which is the good way to focus for ranking. Thanks, it is good always to read your blog.
Pasquale Mellone
31 May 2021Thanks Ravi, appreciate your comment
luke
13 August 2021Great guide. simple and to the point. Deserves to rank.
Pasquale Mellone
14 August 2021thank you!